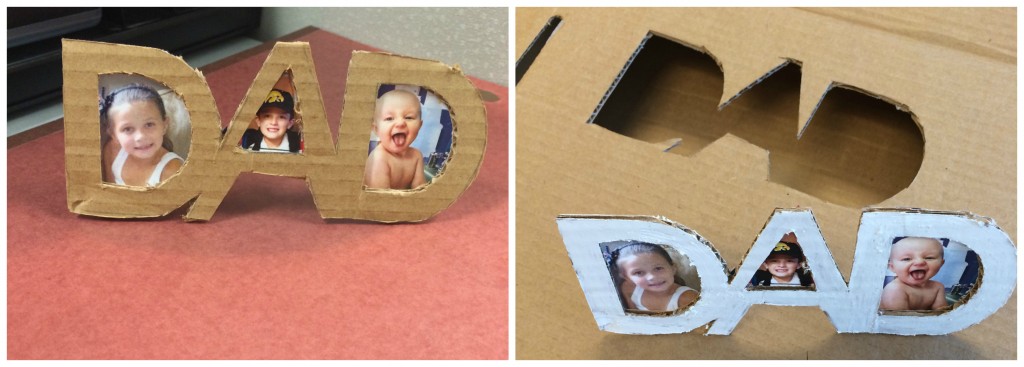
You can be like everyone else in the world and buy him a tie for Father’s Day or you can spice things up and create the dad in your life something special. The latter will give you a chance to show off your crafty side, not to mention, it will save you a couple bucks. Try this DIY Father’s Day picture frame and impress the special man in your life!
Here’s what you’ll need:
- moving boxes
- box cutter
- pencil
- tape or hotglue
- paperclips
- 3 wallet size pictures (printed)
*For the picture, remember to print them small for this particular frame. The only part of the picture being utilized is the heads of the people in them.
Step 1: Using a pencil, trace the outline of the letters. Be sure to make the holes in the letters D and the letter A big enough to fit the heads from your photos. Also, keep the letters connected (for example: the D touches the A, and the A touches both Ds)
Step 2: Use a boxcutter to cut out your frame.
Step 3: Put the photos behind the frames and mark where you want to cut them for the holes to show the part of the photos you want to display.
Step 4: After cutting the photos to the appropriate sizes, tape them to the back of the frame with clear tape. You can also use hotglue.
Step 5: Taking to paper clips and pull each one to make acute angles. Tape to the back of the frame. (Alternative: Glue magnets to the back and use as fridge decor.)
Step 6: Decorate your frame however you please.
That’s all it takes to create this frame! You can make this Father’s Day Picture Frame small enough to sit on his desk at work, or make a bigger frame to prop up somewhere around the house.
Click here for a quick tutorial on this craft.


